Your Ad Here

Tuesday, April 17, 2007

Faster, Vista, Faster!

One of my favorite features in Windows Vista is one I don't think Microsoft is emphasizing enough: ReadyBoost. It lets you use a flash drive to speed up Vista, and it does so noticeably.

I'd love to see Microsoft selling retail copies of Vista packaged with a 1- or 2-gigabyte flash drive. Unfortunately, the company seems more interested in hyping the Aero interface, which is cool but basically eye candy, over ReadyBoost, which is a real performance enhancer.

So I was very glad to see this post by Microsoft OS czar Jim Allchin at the Windows Vista Team Blog, in which he provides some detail on how ReadyBoost works:

. . . Well with Windows ReadyBoost, if you have a flash drive (like a USB thumb drive or an SD card) you can just use this to make your computer run better with Windows Vista. You simply plug in a flash drive and Windows Vista will use Windows ReadyBoost to utilize the flash memory to improve performance.

I should be clear that while flash drives do contain memory, Windows ReadyBoost isn't really using that memory to increase the main system RAM in your computer. Instead, ReadyBoost uses the flash drive to store information that is being used by the memory manager. If you are running a lot of applications on a system that has limited memory, Windows ReadyBoost will use the flash drive to create a copy of virtual memory that is not quite as fast as RAM, but a whole lot faster than going to the hard disk. What is very cool here is that there is nothing stored on this flash disk that isn't also on the hard disk, so if you remove the flash drive, the memory manager sees the change and automatically goes to the hard disk. While the performance gain from ReadyBoost is gone, you don't lose any data and there is no interruption. And because the Windows Readyboost cache on the flash drive is encrypted using AES-128, you don't need to worry about exposing sensitive data if the flash drive is stolen or lost. Also, the memory manager compresses the pages before writing them into the cache on the flash disk, which means you'll get more mileage from each MB.

Don't think, though, that you can plug several 2-GB flash drives into the USB 2.0 ports on your PC and get ever-increasing performance. Loren Killon, the storage expert from the Vista team who counseled me about my recent hardware crash, told me that, past 2 GB on a flash drive, there's a point of diminshing returns for ReadyBoost.

Allchin's post also confirms a suspicion I've had about Vista for a while. It seems to me, as I toggle between using Windows XP and Vista on the same machine, that Vista seems faster, even without a flash drive plugged in. I have been meaning to benchmark this, but have not yet had time.

It turns out that, if you have enough memory, Vista indeed will outperform XP:

We redesigned the memory manager in Windows Vista so that if you give the system more memory, it uses that memory much more efficiently than previous operating systems via a technique called SuperFetch -- part of Windows Vista's intelligent heuristic memory management system. And so Windows Vista on a PC with even more than 1 GB of primary memory (say 2 GB) will generally outperform Windows XP on that same machine -- especially once you have been using the machine for some time because Windows Vista learns what you do the most often and optimizes for this.

Again, this is something Microsoft should talk more about. A lot of people are sitting on the fence about Vista, but actual performance gains would do a lot more to push them to buy than transparent window borders and pretty colors.

NTLDR is Missing.

Issue:

NTLDR is Missing.

Related errors:

Below are the full error messages that may be seen when the computer is booting.

NTLDR is Missing
Press any key to restart

Boot: Couldn't find NTLDR
Please insert another disk

NTLDR is missing
Press Ctrl Alt Del to Restart

Cause:

  1. Computer is booting from a non-bootable source.
  2. Computer hard disk drive is not properly setup in BIOS.
  3. Corrupt NTLDR and/or NTDETECT.COM file.
  4. Misconfiguration with the boot.ini file.
  5. Attempting to upgrade from a Windows 95, 98, or ME computer that is using FAT32.
  6. New hard disk drive being added.
  7. Corrupt boot sector / master boot record.
  8. Seriously corrupted version of Windows 2000 or Windows XP.
  9. Loose or Faulty IDE/EIDE hard disk drive cable.

Solutions:

Computer is booting from a non-bootable source

Many times this error is caused when the computer is attempting to boot from a non-bootable floppy disk or CD-ROM. First verify that no floppy diskette is in the computer, unless you are attempting to boot from a diskette.

If you are attempting to boot from a floppy diskette and are receiving this error message it is likely that the diskette does not have all the necessary files and/or is corrupt.

If you are attempting to install Windows XP or Windows 2000 and are receiving this error message as the computer is booting verify that your computer BIOS has the proper boot settings. For example, if you are attempting to run the install from the CD-ROM make sure the CD-ROM is the first boot device, and not the hard disk drive.

Second, when the computer is booting you should receive the below prompt.

Press any key to boot from the CD

Important: When you see this message press any key such as the Enter key immediately, otherwise it will try booting from the hard drive and likely get the NTLDR error again.

Note: If you are not receiving the above message and your BIOS boot options are set properly it's also possible that your CD-ROM drive may not be booting from the CD-ROM properly. Verify the jumpers are set properly on the CD-ROM drive. Additional information about checking the CD-ROM drive connections can be found on document CH000213.

Additional information: This error has also been known to occur when a memory stick is in a card reader and the computer is attempting to boot from it. If you have any type of card reader or flash reader make sure that no memory stick is inside the computer.

Computer hard disk drive is not properly setup in BIOS

Verify that your computer hard disk drive is properly setup in the BIOS / CMOS setup. Improper settings can cause this error.

Corrupt NTLDR and/or NTDETECT.COM file

Windows 2000 users
Windows XP users

Windows 2000 users

If your computer is using Microsoft Windows 2000 and you are encountering the NTLDR error. Create the below boot.ini file on the floppy diskette drive.

[boot loader]
timeout=30
default=multi(0)disk(0)rdisk(0)partition(1)\WINNT
[operating systems]
multi(0)disk(0)rdisk(0)partition(1)\WINNT="Microsoft Windows 2000 Professional" /fastdetect

Copy the NTLDR and NTDETECT.COM files from another computer using the same Operating System. Both of these files are located in the root directory of the primary hard disk drive. For example, C:\NTLDR and C:\NTDETECT.COM should be the locations of these files on many computers.

  • Please keep in mind that these files are hidden system files, if you need additional help with viewing hidden files in Windows please see document CH000516.

Once these files have been copied to a floppy diskette reboot the computer and copy the NTLDR and NTDETECT.COM files to the root directory of the primary hard disk drive. Below is an example of what commonly should be performed from the A:\> drive.

copy ntldr c:
copy ntdetect.com c:

After the above two files have been copied, remove the floppy diskette and reboot the computer.

Windows XP users

  1. Insert the Windows XP bootable CD into the computer.
  2. When prompted to press any key to boot from the CD, press any key.
  3. Once in the Windows XP setup menu press the "R" key to repair Windows.
  4. Log into your Windows installation by pressing the "1" key and pressing enter.
  5. You will then be prompted for your administrator password, enter that password.
  6. Copy the below two files to the root directory of the primary hard disk. In the below example we are copying these files from the CD-ROM drive letter "E". This letter may be different on your computer.

    copy e:\i386\ntldr c:\
    copy e:\i386\ntdetect.com c:\

  7. Once both of these files have been successfully copied, remove the CD from the computer and reboot.

Misconfiguration with the boot.ini file

Edit the boot.ini on the root directory of the hard disk drive and verify that it is pointing to the correct location of your Windows Operating System and that the partitions are properly defined.

Attempting to upgrade from a Windows 95, 98, or ME computer that is using FAT32

If you are getting this error message while you are attempting to upgrade to Windows 2000 or Windows XP from Windows 95, Windows 98, or Windows ME running FAT32 please try the below recommendations.

  1. Boot the computer with a Windows 95, Windows 98 or Windows ME bootable diskette.
  2. At the A:\> prompt type:

    sys c:

  3. After pressing enter you should receive the "System Transferred" message. Once this has been completed remove the floppy diskette and reboot the computer.

New hard disk drive being added

If you are attempting to add a new hard disk drive to the computer make sure that drive is a blank drive. Adding a new hard disk drive to a computer that already has Windows installed on it may cause the NTLDR error to occur.

If you are unsure if the new drive is blank or not try booting from a bootable diskette and format the new hard disk drive.

Corrupt boot sector / master boot record

It's possible your computer's hard disk drive may have a corrupt boot sector and/or master boot record. These can be repaired through the Microsoft Windows Recovery console by running the fixboot and fixmbr commands.

Seriously corrupted version of Windows 2000 or Windows XP

If you have tried each of the above recommendations that apply to your situation and you continue to experience this issue it is possible you may have a seriously corrupted version of Microsoft Windows. Therefore we would recommend you reinstall Microsoft Windows 2000 and Windows XP.

If you are encountering this issue during your setup you may wish to completely erase your computer hard disk drive and all of its existing data and then install Microsoft Windows 2000 / Windows XP.

Loose or Faulty IDE/EIDE hard disk drive cable

This issue has been known to be caused by a loose or fault IDE/EIDE cable. If the above recommendation does not resolve your issue and your computer hard disk drive is using an IDE or EIDE interface. Verify the computer hard disk drive cable is firmly connected by disconnected and reconnecting the cable.

If the issue continues it is also a possibility that the computer has a faulty cable, try replacing the hard disk drive cable with another cable and/or a new cable.

Monday, April 16, 2007

Top 5 Cool Vista Tricks

1. The Value of VHD
Vista's CompletePC backup is more valuable than you might think. After you do a CompletePC backup, you'll see a group of XML files and a large .VHD file in your backup folder. The files will be large because CompletePC backup's file compression isn't much to speak of. For example, I did a CompletePC backup of a 12GB drive and it finished just under 10GB after backup. The fact that it's a .VHD file, however, is quite valuable.

Figure 1
Figure 1. Your CompletePC backup creates a .VHD file you can mount and use to access the backed up data.

The .VHD file format may ring a bell if you've ever worked with Virtual PC. Virtual PC images are also .VHD files. This doesn't mean you can boot a virtual system using a CompletePC backup file. If you're already running a virtual system, however, you can go into the Virtual PC configuration options and mount the CompletePC backup .VHD file to get at the files inside.

Going one step further, you can also use vhdmount.exe. VHDmount is a tool that ships with Virtual Server 2005 R2, Service Pack 1. You can use it to mount a .VHD file and access it as if it were a local drive. You don't even need to go through a virtual operating system in order to access your backed up data.

What's the practical side to all this? If you back up your system and realize you just need one lousy file, you don't have to restore the entire system. Just go in and get the file you need.

If you want to learn more about mounting .VHD files, check out an article by Ben Armstrong, manager on the Virtual Machine Team at Microsoft. He tells you how to configure your system to mount .VHD files by simply double-clicking.

2. Share Those iCalendars
This is a cool little gem. By using the iCalendar standard, you can share your calendars with anyone around the world, whether or not they're using Vista. There's a bevy of different calendar tools that use the iCalendar standard, so you can share away.

Figure 2
Figure 2. Using iCalendar helps you keep tabs of your family, your work and your favorite TV shows. You don't even have to do it yourself-just download someone else's.

You can also export your own calendar or import someone else's. You can even publish and/or subscribe to Web-based calendars by using HTTP and WebDAV.

How does this benefit you? Well, if you've ever spent a couple of hours researching your favorite TV shows, looking up their episode guide on tv.com and adding the titles and dates to your Calendar so you don't miss a show (or know when to download the next one), then you might like to know that you can check out online sites that will give you that information for free. Others have already done the work, you just have to find it and import it or sign up for a subscription. Who would do such a thing? Check out www.icalshare.com and you'll see.

You can also create multiple levels of calendars you can turn on and off with a single click. For example, you can have a main calendar called "Family Schedule." Then beneath that, you can have individual family member schedules like "Calvin," "Hobbes" and so on. That way, you can keep track of the whole family or all of your employees.

You can also share your calendar so your staff or your family can keep you up-to-date on what's happening in their lives. You'll clearly see "Staff Meeting" days, upcoming games or whatever you need.

3. Health Check -- Stat
You know there is a new performance monitoring tool called the Reliability and Performance Monitor. You may have noticed that it's a good deal more robust than its predecessors. All this additional capability may seem overwhelming, but before you push it aside, you should know there are a couple of preconfigured diagnostics you can run on your system with little trouble. Here are a few steps you can take:

The Simple Method: From the Control Panel, find Performance Information and Tools (or type it into the Search pane from the Start orb). In the Tasks pane, you can select Advanced Tools. You'll notice a bunch of different tools. Locate the "Generate a system health report" tool. Wait about one minute while the test runs and you'll get a nicely detailed report. Even though you went through a different tool, you're still using the Reliability and Performance Monitor.

The Quick Method: If you need to do a quicker health check, open a command prompt. (It doesn't matter whether it's elevated or non-elevated. It will still ask you for UAC permissions to proceed.) Type perfmon /report and the same tool kicks off. You could also use perfmon /report "Data_Collector_Set" to run any one of the System Data Collector Sets or your own User-created Data Collector Sets.

The Admin Method: Time to take the next step. Run the tool from the Reliability and Performance Monitor itself. Open the monitor tool and you'll see the System Data Collector Sets. There are four preconfigured tests, so you can do more than an overall system diagnostic. You can do LAN diagnostics, System Performance and Wireless Diagnostics, as well as System Diagnostics.

Figure 3
Figure 3. The System Diagnostics Report gives you a full rundown of how your system checks out.

To perform the System Diagnostics, for example, select "System Diagnostics." Then right-click and choose Start. Look down to the Reports section, open the System Diagnostics and select the report that is currently running (the latest one at the top of the list). This may sound complicated, but you have to start somewhere with the new Reliability and Performance Monitor.

Go ahead and use the quick command-line method to see the Reliability and Performance Monitor in action. It's a truly solid diagnostic tool, and it's no longer hidden beneath a ton of complexity or a million selection options.

4. You Have the Control
Parental Control is a great new feature in Windows Vista, and it's useful for much more than keeping your kids away from sketchy Web sites. You can control when and for how long someone uses a computer, what games or applications they can play and use, as well as what Web sites they can visit. Afterward, you can see an audit of all their activity both on and off the Web. It's about time this type of solution was integrated directly into the operating system.

When working with the Allow/Block settings, you should only include "Allowed" sites at first. Trying to handle the thousands of blocked sites will drive you crazy. Start a user (or your child) off with a handful of approved sites and then expand the list over time. This is the best way to prevent them from circumventing your efforts by using proxy sites or by going through Google image (or other image-viewing sites) and viewing inappropriate content.

Figure 4
Figure 4. You can choose to "Only Allow," which is the recommended approach. You can also import a WebAllowBlockList file.

You can configure the Allow/Block sites through the Parental Control settings or by importing an Allow/Block file. First, go to your Allow or Block specific Web sites section. You can type an address in the Web site address pane and then hit Allow or Block to manually add sites. For faster progress, hit the Export button and save the file.

When you go to open the file, you'll notice it's an odd file type. It's called a WebAllowBlockList file. Aside from the Parental Control being able to open the file, you won't see any other options. Right click the file, select Open With, and then choose Notepad or some other text editor.

Now you'll see that the file isn't all that complicated to work with. Here is a simple example that includes one allowed site and one blocked site:

http://microsoft.com/http://badstuff.com/

The numeral 1 is the code for Allow and 2 is code for Block. From here, you can add as many sites as you like. When you're done, you can import the file back into your Parental Controls.

Obviously, there are a billion possible sites you might want to block. You can do this manually or pick up a filter off the Web. In the latter case, you would then have to configure the entries to work with your Parental Control entries. For example, you can search for "URL deny lists" or "URL block lists."

One of my favorite best block lists comes from Rich Krol (get it here). You'll notice there are two XML files -- one list for porn content and one for spyware. Take the time and reconfigure these to work with the Vista format.

Keep in mind that you can create a list with only Allow settings and then choose the "Only Allow Web sites that are on the allow list" option. So when a friend asks for the list of Web sites you let your users (or your kids) visit, you can export your entire list to share.

Sometimes the mere presence of a deterrent is effective. Even if you don't filter a thing, if you let your users or your kids know that you can see every site they visit, that should scare them enough to resolve most of your worries.

5. Give Yourself High Marks
The first time many of us opened up the Windows Experience Index (WEI) and saw the pitiful score, we were ticked off-at least I was. A brand new laptop should have a higher score than a 2.9.

As you learn more about how the rating works, however, the score probably won't sting as much. To calculate the WEI, Vista takes the lowest of five scores that relate to your processor, RAM and so on. Maybe that's the goal of the WEI -- to embarrass or anger us into spending more money on better hardware.

Figure 5
Figure 5. How is this for a WEI Score?

There are a couple of ways to increase your rating (besides shelling out thousands of dollars for upgrades). First off, run the test again. Sometimes just running it again will boost you over the three mark. I ran mine again and got a 3.1. Another tip is to turn off your Aero glass interface, which will boost performance. Or, you could go right into the .XML file that stores the results and give yourself a higher score.

The Windows System Assessment Tool (WinSAT), which is the tool that calculates the WEI, stores its output in the %systemroot%\Performance\WinSAT\DataStore. Each time you run WinSAT, it creates a new XML file and stores it in this folder with the assessment date at the beginning of the file name.

For example, a file might look like this: 2007-01-01 12.00.00.000 Assessment (Formal).WinSAT.xml. When you first open the folder, you might be shocked to see there are more than five results. In fact, WinSAT runs a variety of tests and assigns scores, but it will typically only show us the top five.

My research assistant Alan Wright took some time and tweaked the file to see if he could change it. "The first thing I would recommend is turning off the UAC for this procedure," he says. "Then open the file using WordPad (I used several editors but WordPad was the easiest to work with and didn't try to change the file format). You only have to change the top five scores to whatever number you like and close the file. When you go to look at your WEI settings again, it should show you the new number.

"If you stay below 5.9, your number will still have a blue background, but if you go too high it does change the background to grey, which isn't a big deal either way but does indicate a difference," he says. "To 'fix' this and make it go back to normal, I just deleted the file and rebooted my machine and then re-ran the test. It worked fine. I was back to my 3.1 rating. Knowing that I could tweak it, I went back in and gave myself a 4.0. That's how I feel today. Maybe tomorrow I'll be a 6.0."

Now why would you even want to do this in the first place? Well, for one thing, you learn a lot about WinSAT by playing with this. You also see that the testing process is a lot more detailed than you might have thought.

Really though, this is just one of those things that makes you smile, especially after seeing that 2.9 rating. To see some other scores that people are getting there's a site called www.shareyourscore.com where people are competing for the highest scores. Of course, you and I know how to win that game.

Finding the Diamonds
So there you have it -- five diverse cool tips that you may or may not use. Vista is filled with nuggets like these. You just have to dig a bit, sift through some files to find them, bring them to the surface and polish them up.

Windows Vista Shortcut Keys

Managing Windows

Win+TabFlip 3D [more info]
Ctrl+Win+TabPersistent Flip 3D
Win+TCycle through applications on taskbar (showing its live preview)
Win+MMinimize all open windows
Win+Shift+MUndo all window minimization
Win+DToggle showing the desktop

Starting Programs

Win+1Open the first program on your Quick Launch bar
Win+2Open the second program on your Quick Launch bar
Win+nOpen the nth program on your Quick Launch bar
Win+UOpen the ease of access center
Win+FOpen the search window
Win+EOpen Explorer
Win+ROpen the 'Run' window
Ctrl+Shift+EscOpen Windows Task Manager

Logging In And Out

While the below shortcuts seem unwieldy because of their length, they're quite easy to remember once you try them out a few times.

Win, ->, ->, ->, EnterShutdown
Win, ->, ->, ->, UShutdown
Win, ->, ->, ->, RRestart
Win, RightArrowSleep
Win, ->, ->, ->, WSwitch Users
Win+LLocks computer

Viewing Folders With Explorer

Alt+LeftArrowGo back
Alt+RightArrowGo forward
Alt+UpArrowGo up a directory
Alt+DMove focus to address bar
Alt+D, TabMove focus to search bar
Ctrl+MousewheelChange the view type (extra large, small, list view, detail, etc.)

Windows Sidebar And Gadgets

Windows Sidebar provides instant access to gadgets that display a huge variety personalizable information. The below shortcuts allow you to navigate between these gadgets. I suggest just using this table as a reference, since people don't need to navigate gadgets too often.

Move focus to SidebarWin+Space
Cycle through visible gadgetsWin+G

NTOSKRNL.EXE is missing or corrupt.

Issue:

NTOSKRNL.EXE is missing or corrupt.

Related errors:

Below is a listing of the full error message that may be related to this error.

Windows NT could not start because the below file is missing or corrupt:

C:\Winnt\System32\Ntoskrnl.exe

Cause:

  1. Keyboard issue
  2. Miscellaneous corruption
  3. Corrupt boot.ini file.
  4. Missing boot.ini file.
  5. Missing or corrupt ntoskrnl.exe file.
  6. Windows NT installed on a partition bigger then 7.8GB
  7. Corrupted hard disk drive or severely corrupted Windows.

Solution:

Keyboard issue

This issue has also been known to be caused by a short in the ground wire in the keyboard cable. Make sure this is not the cause of your error by replacing the keyboard with a different keyboard or simply just disconnecting the keyboard from the computer.

Miscellaneous corruption

Before trying any of the below recommendations it's recommend that you attempt to load the last known good configuration.

Corrupt boot.ini file

This issue is often caused when the boot.ini is missing or improperly configured. This issue often arises after a user has recently added or removed an operating system on the computer or added or removed hard disk drives in the computer.

Make sure the line pointing to the operating system and it's drive and partition is properly configured in the [boot loader] and [operating systems] section.


Microsoft Windows XP users:

If the boot.ini is severely corrupted or missing a user running Microsoft Windows XP can rebuild the boot.ini to resolve this issue.

Microsoft Windows NT and Windows 2000 users:

To restore the original boot.ini file in Microsoft Windows NT or Windows 2000 you will need an ERD and follow the below steps. If you do not have an ERD you will be unable to follow these steps.

  1. Boot the computer with your Windows NT three setup diskettes or the Windows 2000 setup disc.
  2. In the setup menu, type R to start the repair.
  3. When prompted for the ERD diskette insert the diskette and inspect the startup environment.

Missing or corrupt ntoskrnl.exe file

If the ntoskrnl.exe file is corrupt or missing this can also generate the error. To restore this file follow the below steps.

  1. Insert the Microsoft Windows XP CD. Note: If you have a recovery CD or a restore CD and not a Microsoft Windows XP CD it is likely the below steps will not resolve your issue.
  2. Reboot the computer, as the computer is starting you should see a message to press any key to boot from the CD. When you see this message press any key.
  3. In the Microsoft Windows XP setup menu press the R key to enter the recovery console.
  4. Select the operating system you wish to fix, and then enter the administrator password.
  5. Type expand d:\i386\ntoskrnl.ex_ c:\windows\system32
  6. You will then be prompted if you wish to overwrite the file type Y and press enter to overwrite the file.
  7. Type exit to reboot the computer.

Windows NT installed on a partition bigger then 7.8GB

If you are running Microsoft windows NT 4.0 on a partition larger than 7.8GB this issue can occur if the boot files are located outside this limitation. When this error occurs your computer will have the error message as shown below.

OS Loader v4.01
Disk I/O error status=00000001
Windows NT could not start because the below file is missing or corrupt: winnt\system32\Ntoskrnl.exe
Please reinstall a copy of the above file.

If your system partition is larger than 7.8GB you will need to delete the partition and recreate the partition to 7.8GB or less.

Corrupted hard disk drive or severely corrupted Windows

Attempt to check the hard disk drive for any errors by running the chkdsk error. To do this follow the below steps.

  1. Insert the Microsoft Windows XP CD. Note: If you have a recovery CD or a restore CD and not a Microsoft Windows XP CD it is likely the below steps will not resolve your issue.
  2. Reboot the computer, as the computer is starting you should see a message to press any key to boot from the CD. When you see this message press any key.
  3. In the Microsoft Windows XP setup menu press the R key to enter the recovery console.
  4. Select the operating system you wish to fix, and then enter the administrator password.
  5. Once at the recovery console type chkdsk /r
  6. Once completed type exit and see if issue is resolved.

If after trying all of the above steps you are still encountering the same issue it's likely that Windows is severely corrupted and it is recommended you attempt to reinstall Windows.

Finally, if during the Windows installation you encounter errors it's likely that your hard disk drive is bad.

Dual-Booting Win XP and Vista

Just when you have Windows XP working exactly the way you want, along comes Windows Vista. You want the new OS, but you need to keep the old one as well. Do you need to buy a new PC?
No way: Dual-boot instead.

Dual-booting means installing two operating systems on your computer and, at start-up, choosing which one to launch. Each OS runs independently of the other, with its own settings and its own installed programs. You can install two or more instances of Microsoft Windows XP or of Vista, or any combination of Win XP, Vista, Linux, and older Windows versions. But right now, I'll focus on how to add Vista to your existing Win XP system.

Before starting, you need either a separate partition on your hard drive or a separate drive; if you install Vista on the partition where Windows XP is already installed, Win XP will no longer run. Open My Computer, and make sure it shows multiple hard drive icons (one for each partition). Now check whether the second partition has enough space for Vista (at least 20GB to 30GB if you plan to install major programs). If not, or if you don't have a second partition, start with step 1 to create one. Everyone else can skip right to step 2.

2 Install Vista
At this point, you install Vista, either from within Win XP by inserting the Vista disc and letting Autorun do its thing, or by inserting the disc and rebooting the system (as long as your PC is configured to read the optical drive before the hard drive).

Dual Booting Win XP and Vista

Choose Installation Type
You have two main tasks during the installation. First, on the "Which type of installation do you want?" screen, choose Custom; selecting Upgrade changes your Win XP installation into Vista, which of course won't result in a dual-boot environment. Then, on the subsequent screen, you have to tell Vista where you want it installed; this is where you choose the new partition.

Dual Booting Win XP and Vista

Start It Up
After that, just wait for the installation to finish. Your PC will reboot itself more than once, and with each reboot you'll see your new Boot menu, with Earlier Version of Windows at the top and Microsoft Windows Vista—highlighted—next. Use the arrow keys to select the OS you want to load, and press Enter. — next: Step Three: System Check


Dual Booting Win XP and Vista


3 System Check
The installation process warns you if you select a partition on which you already have Windows installed. If that happens, click Cancel and choose the correct partition. — next: Step Four: Tweak It


Dual Booting Win XP and Vista


4 Tweak It
Once Vista is installed, you can configure the Boot menu. But where earlier versions of Windows conveniently used the boot.ini file to store boot details, Vista uses the Boot Configuration Data (BCD) store—bcdedit.exe from the command prompt—and this utility is stunningly unintuitive. You're better off downloading VistaBootPro (www.vistabootpro.org) or EasyBCD (www.neosmart.net), both of which give you a GUI environment to work with. — next: Finally, Two Warnings

Finally, Two Warnings
1 The BCD provides a more robust start-up environment for Windows, but the downside is that if you want a multiboot system, you must be sure to install Vista last. If you put Vista on a machine and install Windows XP afterward, Vista won't start, because Boot.ini, which Win XP adds automatically, will render the BCD useless (although you can recover it by running the fixntfs.exe utility from within Win XP).

2 Even when your Win XP/Vista machine is happily dual-booting, one problem remains. As you work in Vista, the System Restore utility automatically creates restore points—and you can create them yourself—that let you launch the system in a previous state and recover from errors. But when you exit Vista and launch Win XP, the older OS deletes the Vista restore points.

Windows Vista tips & trick

1. If you hate the look of Aero, click Start/Control Panel/Themes and you can choose a non-Aero theme, such as Windows Classic.

2. Windows Vista's installer can detect serial-ATA (SATA) drives without the need to provide a driver diskette. Don't bother creating a diskette for your SATA drives before you install Vista.

3. If, for some reason, the Vista installation gets interrupted due to an unintentional shutdown or reboot, start the computer without booting the Vista DVD. Windows Vista's installer should pick up where it left off. If it does-n't, then restart the installation over from scratch.

4. When you perform a search with Vista's new, instant search feature, you can save the search in a special folder. This powerful feature allows you to create a virtual folder which, by default, is saved in your \\Searches\ folder. Every time you open such a folder, the search results are updated.

5. In Windows Vista, you can add additional clocks to the system tray. Click the clock, and then click Date and Time Settings. Click the Additional Clocks tab. You can add one or two additional clocks to the tray and select their time zones.

6. You can save your progress in most of the games included with Windows Vista—even the carry-overs from earlier versions of Windows.

7. You can create XML documents, which are more secure than regular text files or even word processor docs. Just create a document in a word processor, print it via the options menu, and select the XPS printer.

8. If you upgrade your graphics card in preparation for Windows Vista, be sure to get a new card with as much local memory as possible. Since Windows Vista renders everything—even the desktop and windows them-selves—as 3D surfaces, local 3D memory greatly improves performance...sometimes even more than a more powerful GPU.

9. Windows Vista games deposit their saves into a special directory, called Saved Games, in your personal folder. In theory, that will make upgrading to a new system much easier for gamers, who like to migrate their game saves.

10. When using the Help system, it's usually advantageous to include Microsoft's online database in your search. The online/offline status of your search is located on the bottom right of the Help window. You can click it to toggle.

11. The Games folder is a powerful repository of all things gaming. From within, you launch games, update games with the latest patches, enable parental controls to protect younger users from harmful content, and more. Invoke it by clicking Start/Games.

12. Several applications are available to help you tweak Windows Vista for maximum performance. They in-clude TweakVI (www.totalidea.com), TweakVista (www.tweakvista.com/tweakvistautility), and VistaBootPRO (www.vistabootpro.org). And don't forget about Windows ReadyBoost, which lets you use a removable flash memory drive to boost system memory.

13. Do you use the icon in the upper left corner of system and application windows? A quick double-click closes the window (instead of a single click on the X at the upper right). Though Microsoft left the icon out in Vista, the function remains.—Sarah Pike

14. In Microsoft Windows Explorer, you can use column headers (Name, Size, and so on) to sort files. Savvy users may right-click on a column head to remove items or add some—say, Dimensions for images. There are around 45 such columns available in Windows XP. Windows Vista has well over 250, covering a multitude of metadata.—Sarah Pike

15. If you've become used to surfing your Program Menu to get to applications, you'll be in for a shock when you first use Microsoft Windows Vista. The new Program Menu shows you only recently used applications and requires extra clicks to navigate to submenus. This can be very frustrating but, thankfully, the Search box Microsoft has added to the Start menu is a great replacement—as long as you're an accurate typist. As quickly as you can type, it returns intelligent results in apps, files, even e-mail messages.—Dave Cardinal, freelance writer

Windows History


Microsoft first began development of the Interface Manager (subsequently renamed Microsoft Windows) in September 1981.
Although the first prototypes used Multiplan and Word-like menus at the bottom of the screen, the interface was changed in 1982 to use pull-down menus and dialogs, as used on the Xerox Star.
Microsoft finally announced Windows in November 1983, with pressure from just-released VisiOn and impending TopView.
This was after the release of the Apple Lisa, and before Digital Research announced GEM, and DESQ from Quarterdeck and the Amiga Workbench , or GEOS/GeoWorks Ensemble, IBM OS/2, NeXTstep or even DeskMate from Tandy.
Windows promised an easy-to-use graphical interface, device-independent graphics and multitasking support.
The development was delayed several times, however, and the Windows 1.0 hit the store shelves in November 1985. The selection of applications was sparse, however, and Windows sales were modest.

Windows 1.0 package, included:

MS-DOS Executive, Calendar, Cardfile, Notepad, Terminal, Calculator, Clock, Reversi, Control Panel, PIF (Program Information File) Editor, Print Spooler, Clipboard, RAMDrive, Windows Write, Windows Paint.
-
Windows 1.0

Windows 1.0 advertising:

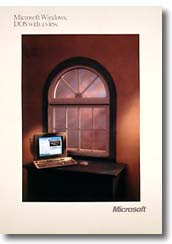
"Windows will instantly deliver you a more productive present.
And a leap into the future."

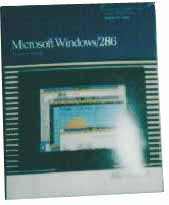
When Windows/386 was released, Microsoft renamed Windows 2.0 to Windows/286 for consistency. Windows 2.0, introduced in the fall of 1987, provided significant useability improvements to Windows. With the addition of icons and overlapping windows, Windows became a viable environment for development of major applications (such as Excel, Word for Windows, Corel Draw!, Ami, PageMaker and Micrografx Designer), and the sales were spurred by the runtime ("Single Application Environment") versions supplied by the independent software vendors.
In late 1987 Microsoft released Windows/386. While it was functionally equivalent to its sibling, Windows/286, in running Windows applications, it provided the capability to run multiple DOS applications simultaneously in the extended memory.
Windows/286 >>

Windows 3.0, released in May, 1990, was a complete overhaul of the Windows environment. With the capability to address memory beyond 640K and a much more powerful user interface, independent software vendors started developing Windows applications with vigor. The powerful new applications helped Microsoft sell more than 10 million copies of Windows, making it the best-selling graphical user interface in the history of computing. Windows 3.1

Windows 3.1, released in April, 1992 provides significant improvements to Windows 3.0. In its first two months on the market, it sold over 3 million copies, including upgrades from Windows 3.0.
Windows 3.11, added no new features but corrects some existing, mostly network-related problems. It is replacing Windows 3.1 at the retail and OEM levels, and the upgrade was available free from ftp.microsoft.com.

Windows for Workgroups 3.1 , released in October, 1992, was the first integrated Windows and networking package offered by Microsoft. It provided peer-to-peer file and printer sharing capabilities highly integrated into the Windows environment. The simple-to-use-and-install networking allows the user to specify which files on the user's machine should be made accessible to others. The files can then be accessed from other machines running either Windows or DOS.
Windows for Workgroups also includes two additional applications: Microsoft Mail, a network mail package, and Schedule+, a workgroup scheduler.
On November, 1993 Microsoft ships Windows for Workgroups 3.11.

Windows NT 3.1, 94-03-01 is Microsoft's platform of choice for high-end systems. It is intended for use in network servers, workstations and software development machines; it will not replace Windows for DOS. While Windows NT's user interface is very similar to that of Windows 3.1, it is based on an entirely new operating system kernel.
Windows NT 3.5, 94-04-12 provides OLE 2.0, improved performance and reduced memory requirements. It was released in September 1994. Windows NT 3.5 Workstation replaces Windows NT 3.1, while Windows NT 3.5 Server replaces the Windows NT 3.1 Advanced Server.
Windows NT 4.0, ("Cairo") 94-03-15 Microsoft's project for object-oriented Windows, and a successor to the "Daytona" release of Windows NT.
Windows 95, released in August of 1995. A 32-bit system providing full pre-emptive multitasking, advanced file systems, threading, networking and more. Includes MS-DOS 7.0, but takes over from DOS completely after starting. Also includes a completely revised user interface.

Windows CE has the look and feel of Windows 95 and NT. Users familiar with either of these operating systems are able to instantly use Handheld PCs and Palm-size PCs.
Windows CE 1.0 devices appeared in November 1996. Over the next year, approximately 500,000 Handheld PC units were sold worldwide.

Windows CE 2.0 became available in early 1998 addresses most of the problems experienced by Windows CE 1.0 users and also added features to the operating system that make it more viable for use by corporate rather than home users.
Windows CE 3.0 Availability June 15, 2000 -- Embedded operating system and its comprehensive development tools -- Platform Builder 3.0 and eMbedded Visual Tools 3.0 -- which enable developers to build rich embedded devices that demand dynamic applications and Internet services. Windows CE 3.0 combines the flexibility and the reliability of an embedded platform with the power of Windows and the Internet.
Windows 98, released in June of 1998. Integrated Web Browsing gives your desktop a browser-like interface. You will 'browse' everything, including stuff on your local computer. Active Desktop allows you to setup your desktop to be your personal web page, complete with links and any web content. You can also place active desktop items, such as a stock ticker, that will update automatically. Internet Explorer 4.0 New browser that supports HTML 4.0 and has an enhanced user interface. ACPI supports OnNow specs for better power management of PCs. FAT32 with Conversion utility Enhanced & Efficient support for larger hard drives. Includes a utility to convert your FAT16 to a FAT32 partition. Multiple Display Support can expand your desktop onto up to 8 connected monitors. New Hardware support will support the latest technology such as DVD, Firewire, USB, and AGP. Win32 Driver model Uses same driver model as Windows NT 5.0 Disk Defragmentor Wizard Enhanced hard drive defragmentor to speed up access to files and applications.

Windows NT 5.0 will include a host of new features. Like Windows 98, it will integrate Internet Explorer 4.0 into the operating system. This new interface will be matched up with the Distributed File System, which Microsoft says will provide "a logical way to organize and navigate the huge volume of information an enterprise assembles on servers, independent of where the servers are physically located.
As of november 1998, NT 5.0 will be known as Windows 2000, making NT a "mainstream" operating system.
Feb. 17 2000, Windows 2000 provides an impressive platform of Internet, intranet, extranet, and management applications that integrate tightly with Active Directory. You can set up virtual private networks - secure, encrypted connections across the Internet - with your choice of protocol. You can encrypt data on the network or on-disk. You can give users consistent access to the same files and objects from any network-connected PC. You can use the Windows Installer to distribute software to users over the LAN.
Thursday Sep. 14, 2000 Microsoft released Windows Me, short for Millenium Edition, which is aimed at the home user. The Me operating system boasts some enhanced multimedia features, such as an automated video editor and improved Internet plumbing. But unlike Microsoft's Windows 2000 OS which offers advanced security, reliability, and networking features Windows Me is basically just an upgrade to the DOS-based code on which previous Windows versions have been built.

WINDOWS XP
Microsoft officially launches it on October 25th. 2001.
XP is a whole new kind of Windows for consumers. Under the hood, it contains the 32-bit kernel and driver set from Windows NT and Windows 2000. Naturally it has tons of new features that no previous version of Windows has, but it also doesn't ignore the past--old DOS and Windows programs will still run, and may even run better.

XP comes in two flavors: Home and Professional. XP Home is a $99 upgrade ($199 for the full version) and Professional is a $199 upgrade ($299 for the full version). Recognizing that many homes have more than one PC, Microsoft also plans to offer discounts of $8 to $12 off the price of additional upgrades for home users (the Open Licensing Program is still available for business or home users who need 5 or more copies). That's fortunate because you'll need the additional licenses since the Product Activation feature makes it all but impossible to install a single copy on more than one PC.